Sunday, November 14, 2010

Repairing Laptop Adapter-Short Circuit

This week my wife inform that her laptop battery was not charging.. yeah... i know that her adapter got problem... Then, she inform that her adapter produce beep...beep... sound... So i inform her to get new 1 bcoz nobody would repair that thing!! And in market the new price juz  only around RM180 for Compaq... 

This weekend she come back from her working district and she pass the adapter to me... arghhhh!!! expect me to repair that thing for her.. So, she could save RM180 for her!!! Ok...

So, I try to solve the problem even i never "operate" that thing and nobody would repair also.. Normally, laptop adapter would never have any screw to dismantle the item... So, I use screw driver to break the chasing... Luckily, the casing was not damage so bad.. Later, I able to use back if repairing process success...

After fully dismantle the chasing, found that 2 wires were disclose properly which indirectly would cause short circuit.. Maybe, the manufacturer built a safety where once found any short circuit, the circuit would cutoff and beep...beep... sound would automatically produce from the adapter...

Disclose wire at the adapter output

We able to close the expose wire by using a black tape.. but i choose a proper way to repair that item.. So, I take out back my soldering equipment which previously used while I'm active with radio control car for service and assemble electronic parts...

My soldering tools... juz a cheap one..

Also a cheap iron...

Firstly, dismantle all of the soldered wire... This adapter have 3wires which need to dismantle.. Before that, we have to cut out some portion of plastic which cover the wafer board... Use a knife cutter, cut properly the plastic.. But not too big... Only juz enough to put the soldering tools.. And bend the plastic upward... Later, we able to cover it back...

Plastic part which covering the solder...

Cut a small portion to move in the soldering tool... Bend the plastic upward... Dismantle that 3wires by using soldering tools...

Don't know the name.. But it used to cover the wire.. Can be found at electrical and electronic shop..

Put the cover properly... Use a suitable size of diameter.. Too small would difficult to install... Too big would not able to hold the wire nicely...

 And burn it by using lighter...

After burn... Melt and hold tightly the wire..

After completely cover the wires, solder it back to the position.. Make sure that U solder at the right position... Do not change or modify the location..

After complete soldering...

Finally, cover back the plastic cover which had been cut before... Then, seal the adapter back by using tape.. Make sure it seals tightly and not easy to open back.. The tape that I use available at any Tamiya Store...

So, I had saved RM180 and can use the money for others...

Good luck!!!

Monday, November 8, 2010

Connecting Rod Checking

Also called "Con Rod" by some people.. Its a very important thing for every 2 stroke and 4 stoke engine.. Connecting rod is used to joint the crank and piston.. Even the name is "Rod", the part is not in a tubular or cylinder shape..

This part usually give a problem to 2 stroke user especially RXZ.. In a high speed riding, the engine would produce a heat especially on whole of the ball bearing... Dis-advantage on 2 stroke engine is the bearing on the crank shaft, connecting rod and piston is not lubricated by any liquid even oil or water.. So, the bearing have a high percentage to overheat and burnt.. In a high speed with a high temperature, the connecting rod would meet the "melt temperature" and the material is become soft.. At this moment, if the bearing jammed, the system would automatically stop... By having a momentum from the movement of bike, clutch and gear, it would damage the connecting rod..

Beside that, without a balance setting for 2T oil, the resistance on the piston to block would be increase.. In the same time, heat which produced would cause the piston to effloresce.. In a time when the piston become to over size than the limit, it would be jammed and stuck in the block... Momentum inertia from the engine gears movement would cause the connecting rod system to damage..


If it happen, we have to fully overhaul the engine and change the connecting rod system which include the bearing, washer and pin crank... Sometimes, the engine would unable to start once jammed.. This is because of loss compress from the piston.. By changing the piston, it would able to start back but the side effect is too much.. Firstly, the engine would produce a knocking sound from the crank pin, bearing and connecting rod... Second, the engine would not smooth and the engine knocking sound become louder... Finally, the faulty would affect the piston and ring.. If u unlucky, your engine would difficult to start on the next day and the ring sound would be appear...


To check the connecting rod condition, firstly pull and push the rod at "A" direction.. In the same time, hold the crank.. There MUST BE no free play at this direction.. Next, move on "B" direction.. It would have a little free play but not too much.. The vector is about 2-3mm only.. More than that would consider as worn..

Connecting rod system is included:
4. connecting rod
5. crank pin
6. washer (2x)
7. bearing

Current price (on Nov 2010) for RXZ connecting rod system is around RM160.. This price is not include assembly cost which around RM30.. Take note that we unable to dismantle and assemble the connecting rod system into crank ourself without a proper and special tools.. Make sure that use the original parts from Yamaha... Do not use a cheaper or called Japan product.. Original connecting rod would have emblem "55K" instead of " Made in Japan"... Reminder, this part is very important to care..

Monday, November 1, 2010

RXZ Engine Rebuild (Part 1)

After having a few ride on my new RXZ, feels that the engine has need to throw... Its really out of my expectation... So, after dealing with my wife, we bring back 1 set of RXZ engine with plat JCR****... Which mean from an old model... I plan to hybrid with catalyzer engine...

Complete engine without head... stolen already..

Inside the intake and reed valve.. doesn't matter... can be clean later..

The clutch lever also got rusty.. no plan to use back..

Owh... piston already stuck and rusty... 50-50.. dunno whether can use back the block..

I put a brake oil on the piston and leave it for 1 night.. The next day would plan to continue work and remove the piston..

Full of rust... 100% difficult to dismantle..

Working with my father in law.. Hold and hanging the head... put a solid round steel on the top of piston.. And then, knock until the piston fully remove from the block.. we take about 30min to take it out.. full of tired!!

Dented on the block!!

We do some mistake... do not knock on the top of block.. U would damage it... use rubber mallet if needed...

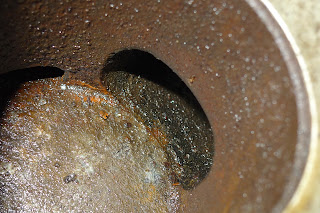
Full of rust... And.. sleeve crack already..

Its time to throw... cannot use anymore.. the sleeve already crack... most of people inform that we able to change the sleeve but it would be no longer tough compare with original sleeve.. piston and ring would be noisy after 5min engine running...

Block crack at screw hole..

Make sure that block hold at straight point... its damage due hitting the screw shaft while remove the piston.. and then we knock with our full of energy!!

Full of rust at bottom end...

Not sure whether can be use or not.. But my wish is that connecting rod still in good condition..

We fill in the bottom end with brake fluid..

Tired already... just pour the brake fluid and leave it... will continue on tomorrow.. the brake fluid would help to loosen and remove the rust..


Daisypath Anniversary tickers